How to use
Take a screenshot manually
You can take a screenshot by calling captureRoboImage().
app/src/test/java/../ManualTest.kt
Roborazzi supports the following APIs.
Capture | Code |
|---|---|
✅ Jetpack Compose's onNode() |
composeTestRule.onNodeWithTag("AddBoxButton")
.captureRoboImage()
|
✅ Espresso's onView() |
onView(ViewMatchers.isRoot())
.captureRoboImage()
onView(withId(R.id.button_first))
.captureRoboImage()
|
✅ View |
val view: View = composeTestRule.activity.findViewById<View>(R.id.button_second)
view.captureRoboImage()
|
✅ Jetpack Compose lambda |
captureRoboImage() {
Text("Hello Compose!")
}
|
Experimental🧪 ✅ Captures the entire screen, including dialogs |
captureScreenRoboImage()
|
✅ Bitmap |
val bitmap: Bitmap = createBitmap(100, 100, Bitmap.Config.ARGB_8888)
.apply {
applyCanvas {
drawColor(android.graphics.Color.YELLOW)
}
}
bitmap.captureRoboImage()
|
Device configuration
You can configure the device by using the @Config annotation and RobolectricDeviceQualifiers.
Configuration | Code |
|---|---|
✅ Predefined device configuration | You can change the device configuration by adding
@RunWith(AndroidJUnit4::class)
@GraphicsMode(GraphicsMode.Mode.NATIVE)
@Config(qualifiers = RobolectricDeviceQualifiers.Pixel5)
class RoborazziTest {
@Test
@Config(qualifiers = RobolectricDeviceQualifiers.Pixel5)
fun test() {
|
✅ Night mode |
@Config(qualifiers = "+night")
|
✅ Locale |
@Config(qualifiers = "+ja")
|
✅ Screen size |
@Config(qualifiers = RobolectricDeviceQualifiers.MediumTablet)
|
Integrate to your GitHub Actions
See Integrate to your GitHub Actions for CI workflows that store, verify, and compare screenshots.
RoborazziRule (Optional)
RoborazziRule is a JUnit rule for Roborazzi. RoborazziRule is optional. You can use captureRoboImage() without this rule.
RoborazziRule has two features.
Provide context such as
RoborazziOptionsandoutputDirectoryPathetc forcaptureRoboImage().Capture screenshots for each test when specifying RoborazziRule.options.captureType.
For example, The following code generates an output file named **custom_outputDirectoryPath**/**custom_outputFileProvider**-com.github.takahirom.roborazzi.sample.RuleTestWithPath.captureRoboImage.png:
To record test interactions as animated images (captureRoboGif(), recordRoboVideo()), see Capture GIFs and videos.
RoborazziRule options
RoborazziRule.Options has:
captureType— what the rule captures per test:None(default; the rule only provides context),LastImage,AllImage(an image per layout change, likeTestClass_method_0.png), orGif. The image-generating types takeonlyFail = trueto capture only when the test fails. Annotate a test with@RoborazziRule.Ignoreto exclude it from these capture types.outputDirectoryPath/outputFileProvider— where output files go and how they are named.roborazziOptions— theRoborazziOptionsprovided tocaptureRoboImage()in the test.
See RoborazziRule for the full definition.
Image comparator custom settings
When comparing images, you may encounter differences due to minor changes related to antialiasing. You can use the options below to avoid this.
Experimental WebP support and other image formats
You can set roborazzi.record.image.extension to webp in your gradle.properties file to generate WebP images.
WebP is a lossy image format by default, which can make managing image differences challenging. To address this, we provide a lossless WebP image comparison feature. To enable WebP support, add testImplementation("io.github.darkxanter:webp-imageio:0.3.3") to your build.gradle.kts file.
You can also use other image formats by implementing your own AwtImageWriter and AwtImageLoader.
Dump mode
If you are having trouble debugging your test, try Dump mode as follows.
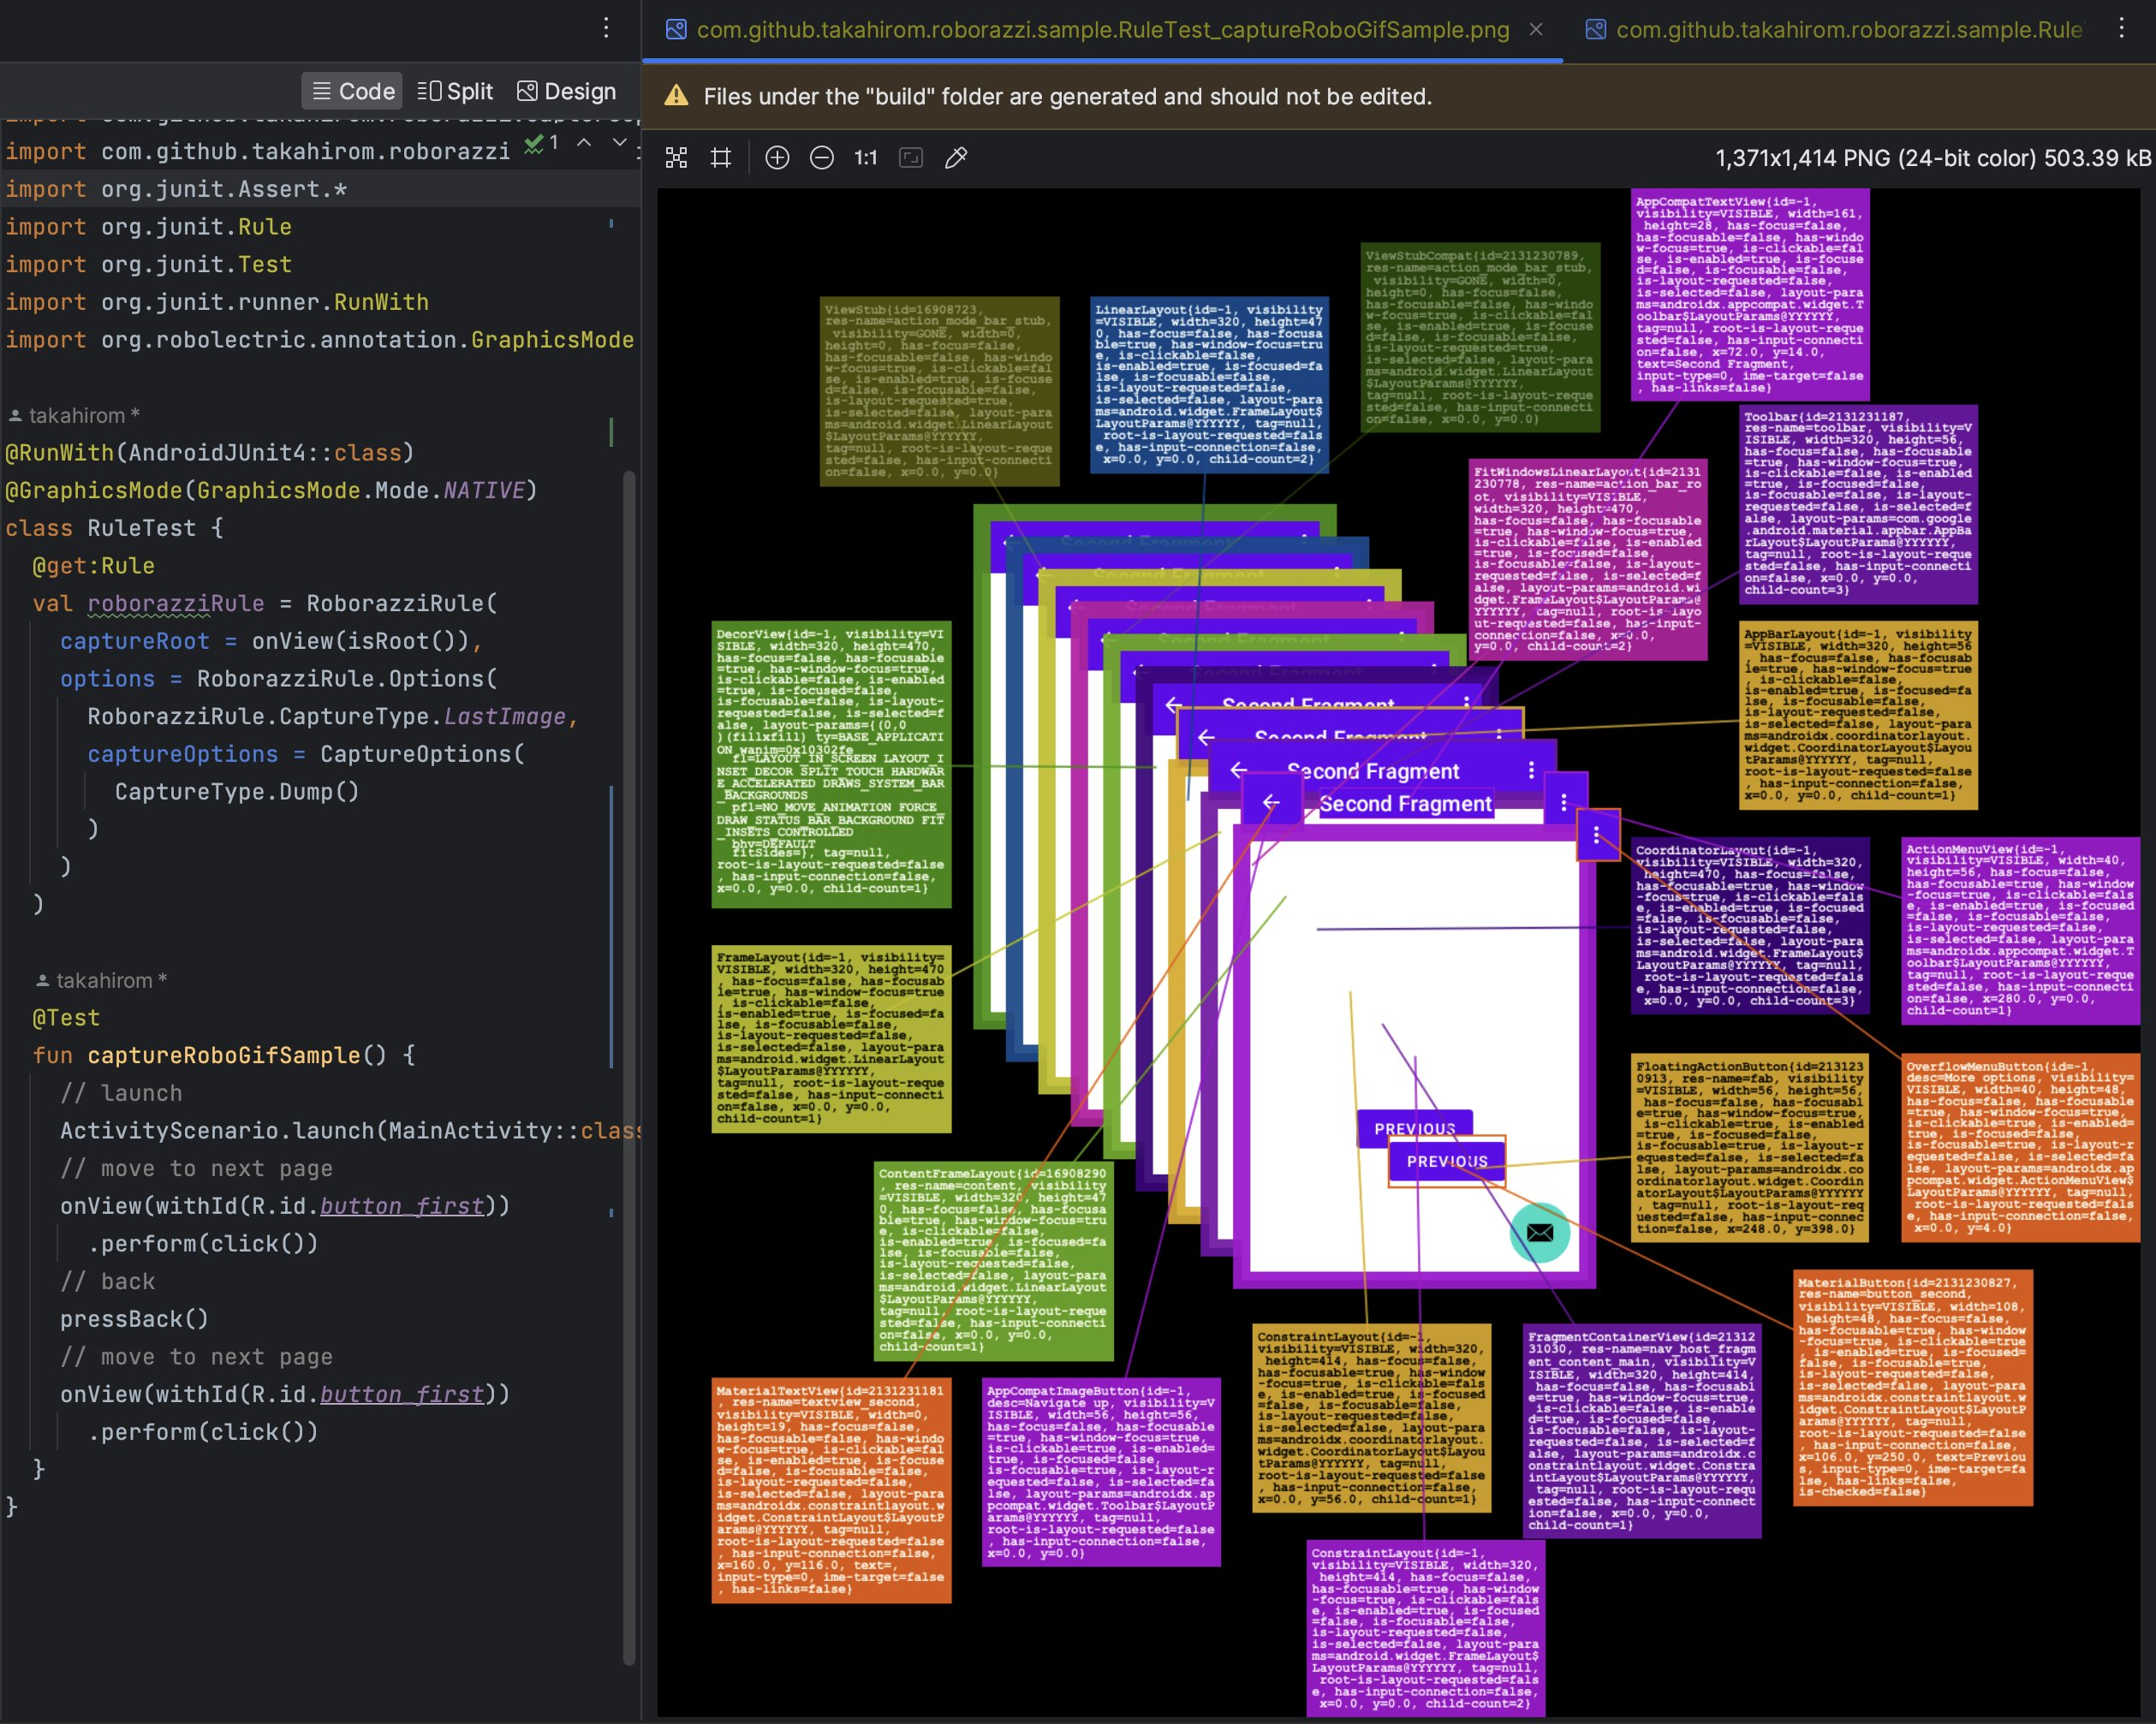
For a machine-readable version of the UI tree for tools and AI agents, see UI tree dump (JSON).
Accessibility Check
Roborazzi Accessibility Checks is a library that integrates accessibility checks into Roborazzi. Please refer to Accessibility Check
Accessibility legend
The AccessibilityLegend capture type (experimental) renders the screenshot next to a legend of the elements a screen reader focuses, numbered in traversal order. It is recorded and verified like any other screenshot, so a changed label, role, state or order shows up as a golden diff.
For each element the legend shows:
the label: content description or text; for a clickable container, the texts of its descendants;
the role (Button, Checkbox, Switch, Tab, Slider, Heading, EditText, …), the state (checked, selected, disabled or a state description) and the value of sliders and progress bars;
for text fields, the value, hint, error and whether it is a password;
live regions and pane titles;
⚠ NO LABELfor a clickable element without a label.
The numbers sit in a column next to the screenshot, so they don't cover the UI. Colors come from a hash of the element's text, so inserting an element rarely recolors the others.
Compose content is read from the merged semantics tree in the order Compose reports to screen readers. Views are read from AccessibilityNodeInfo, so AccessibilityDelegates are taken into account. Compose computes the order only while a screen reader is on, so the capture turns one on in Robolectric while it reads the tree and restores the previous state afterwards. The screenshot itself is taken before that.
The legend approximates what TalkBack reads; it doesn't run TalkBack. It works on Android with Robolectric only. Views that expose virtual children through their own AccessibilityNodeProvider (for example charts or custom widgets) are not expanded: their virtual children don't appear in the legend.
Roborazzi options
Please check out RoborazziOptions for available Roborazzi options.